How to Connect a Node App to MongoDB Atlas
MongoDB is a popular NoSQL database choice for Node apps. There's a reason that the acronyms MERN stack, MEAN stack and even MEVN stack exist to describe an app built on MongoDB, Express, a JavaScript framework (whether React, Angular or Vue), and Node.
If you're learning how to work with MongoDB and Node, setting up a database on your own computer can be a little bit of a headache. Thankfully, MongoDB offer a cloud-based database platform, MongoDB Atlas.
I recently built a few projects with Node and MongoDB Atlas and felt it might be useful to write up a quick guide to how to get the two to talk to each other.
Step 1 - Set up your MongoDB Atlas Account and Cluster

First things first, go to the MongoDB Atlas website and create a free account. You can choose whatever name you want for your organization and project. Choose JavaScript as your preferred language.
Next choose a free shared cluster. This will be enough for demos and small personal projects.
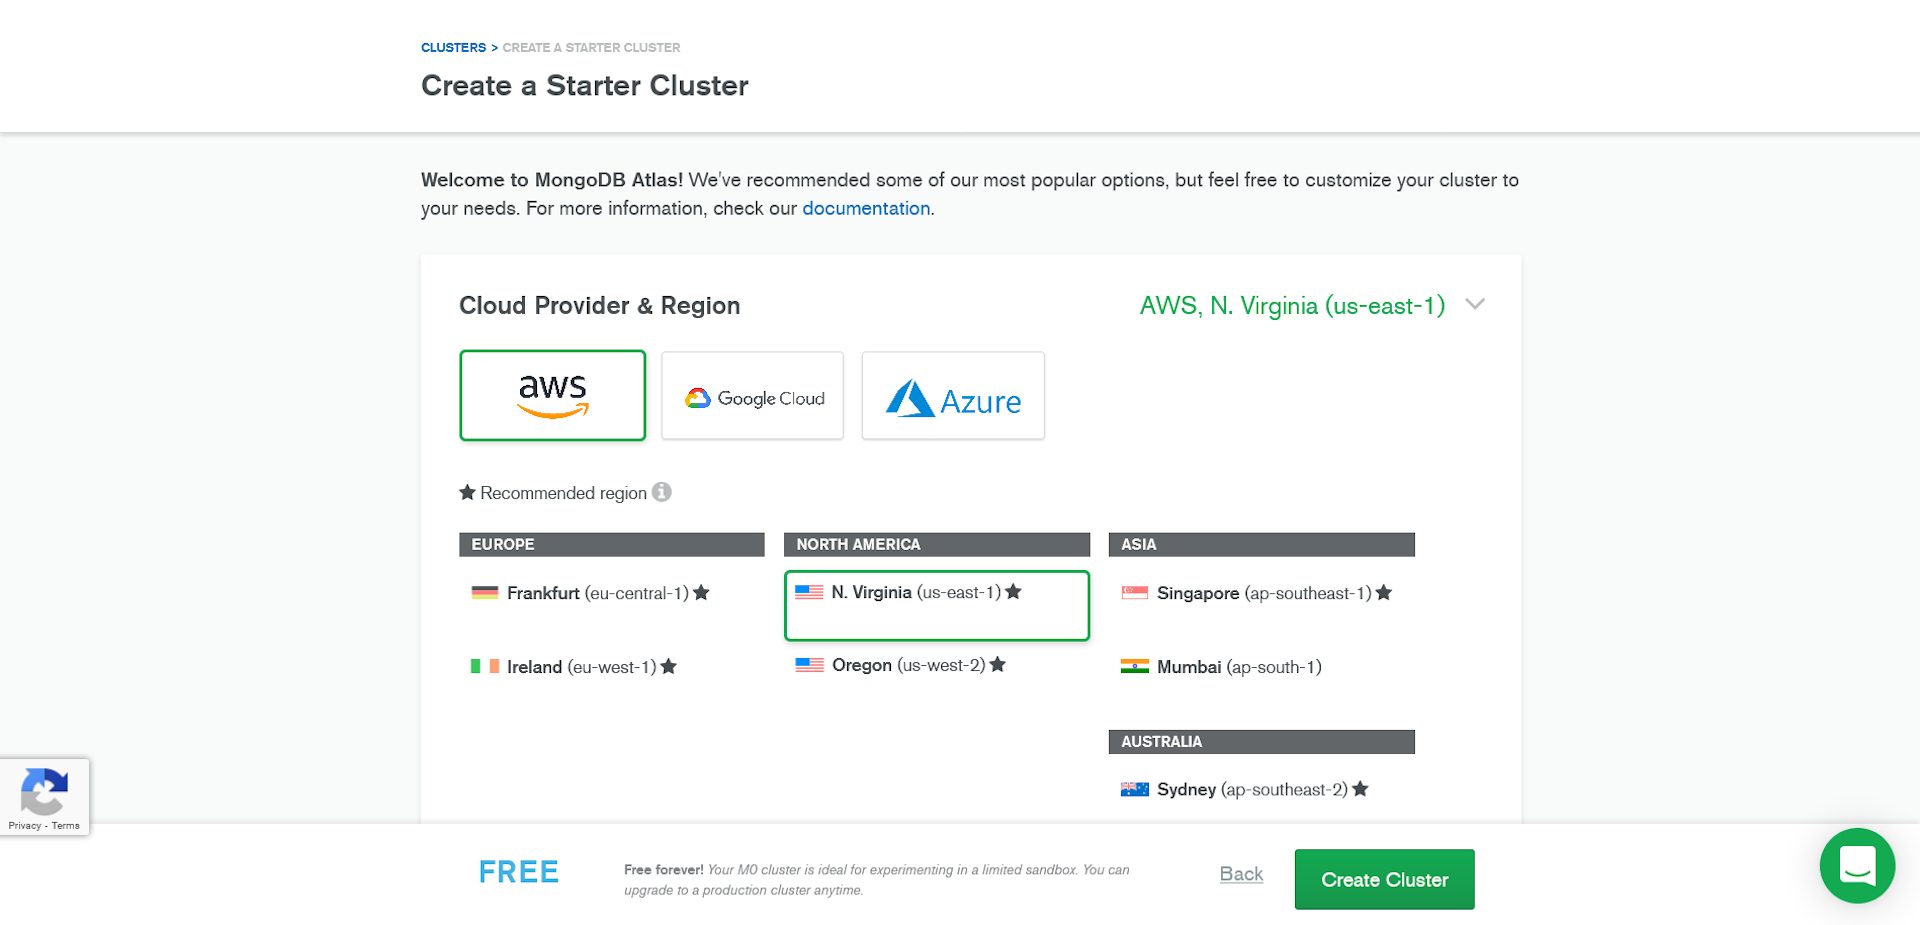
When you're invited to create a starter cluster, you can leave the Cloud Provider and Region as the defaults (unless you have strong feelings about them) and click Create Cluster.
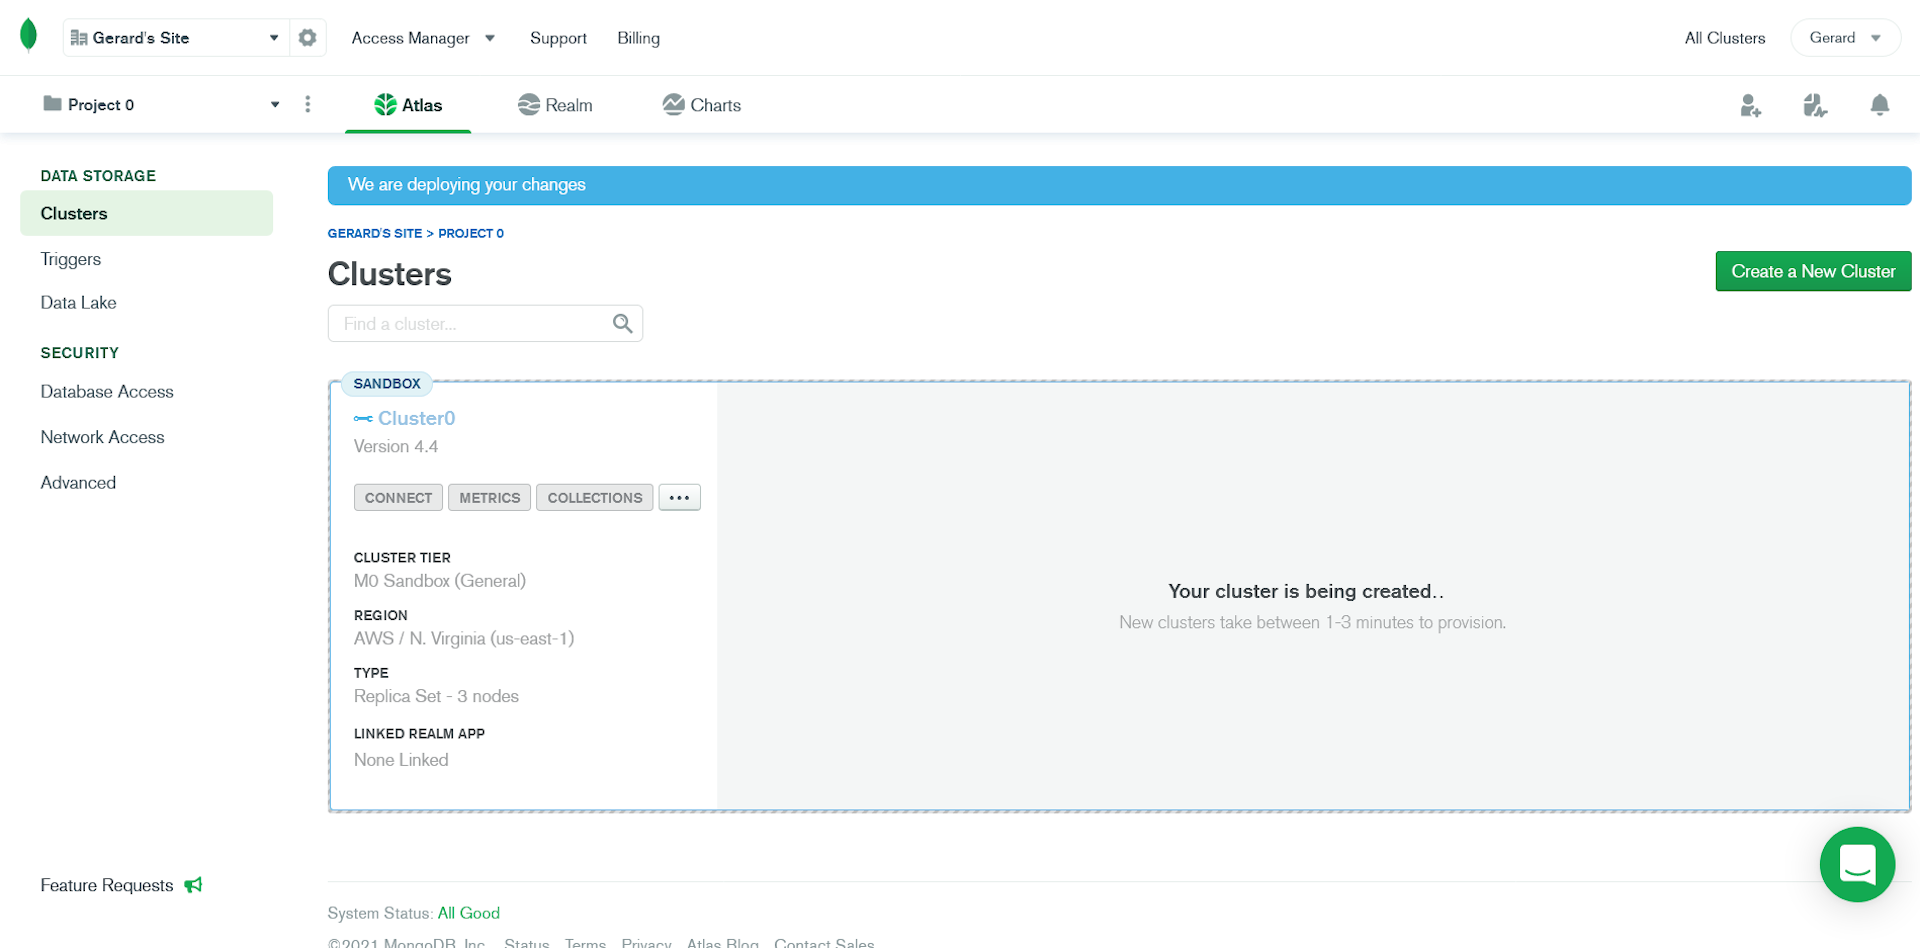
You'll now be brought to your admin dashboard. Click on Create a New Cluster. This can take a couple of minutes.
Once your cluster is ready, click on the Connect button in the sandbox.
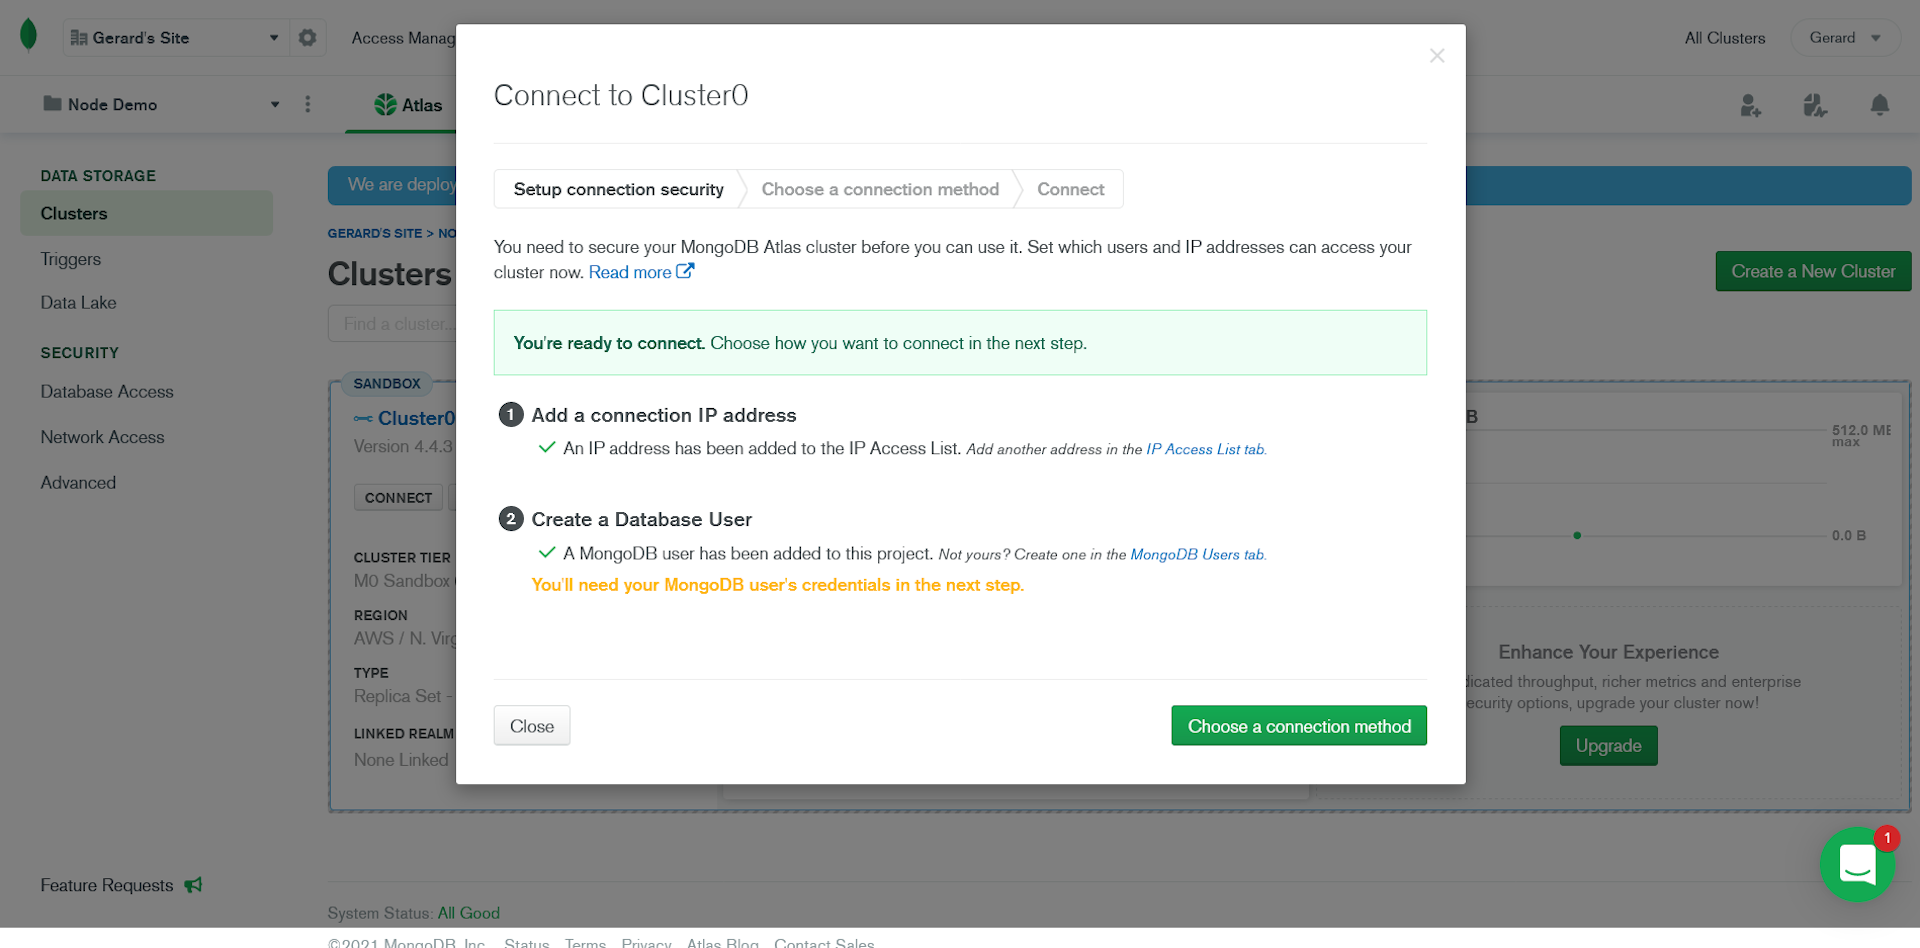
Allow access from all IP addresses. This would be a terrible idea in production but this is just a demo for learning purposes.
Next, create a new user for the database and choose a password. Store these somewhere safe, like your password manager.
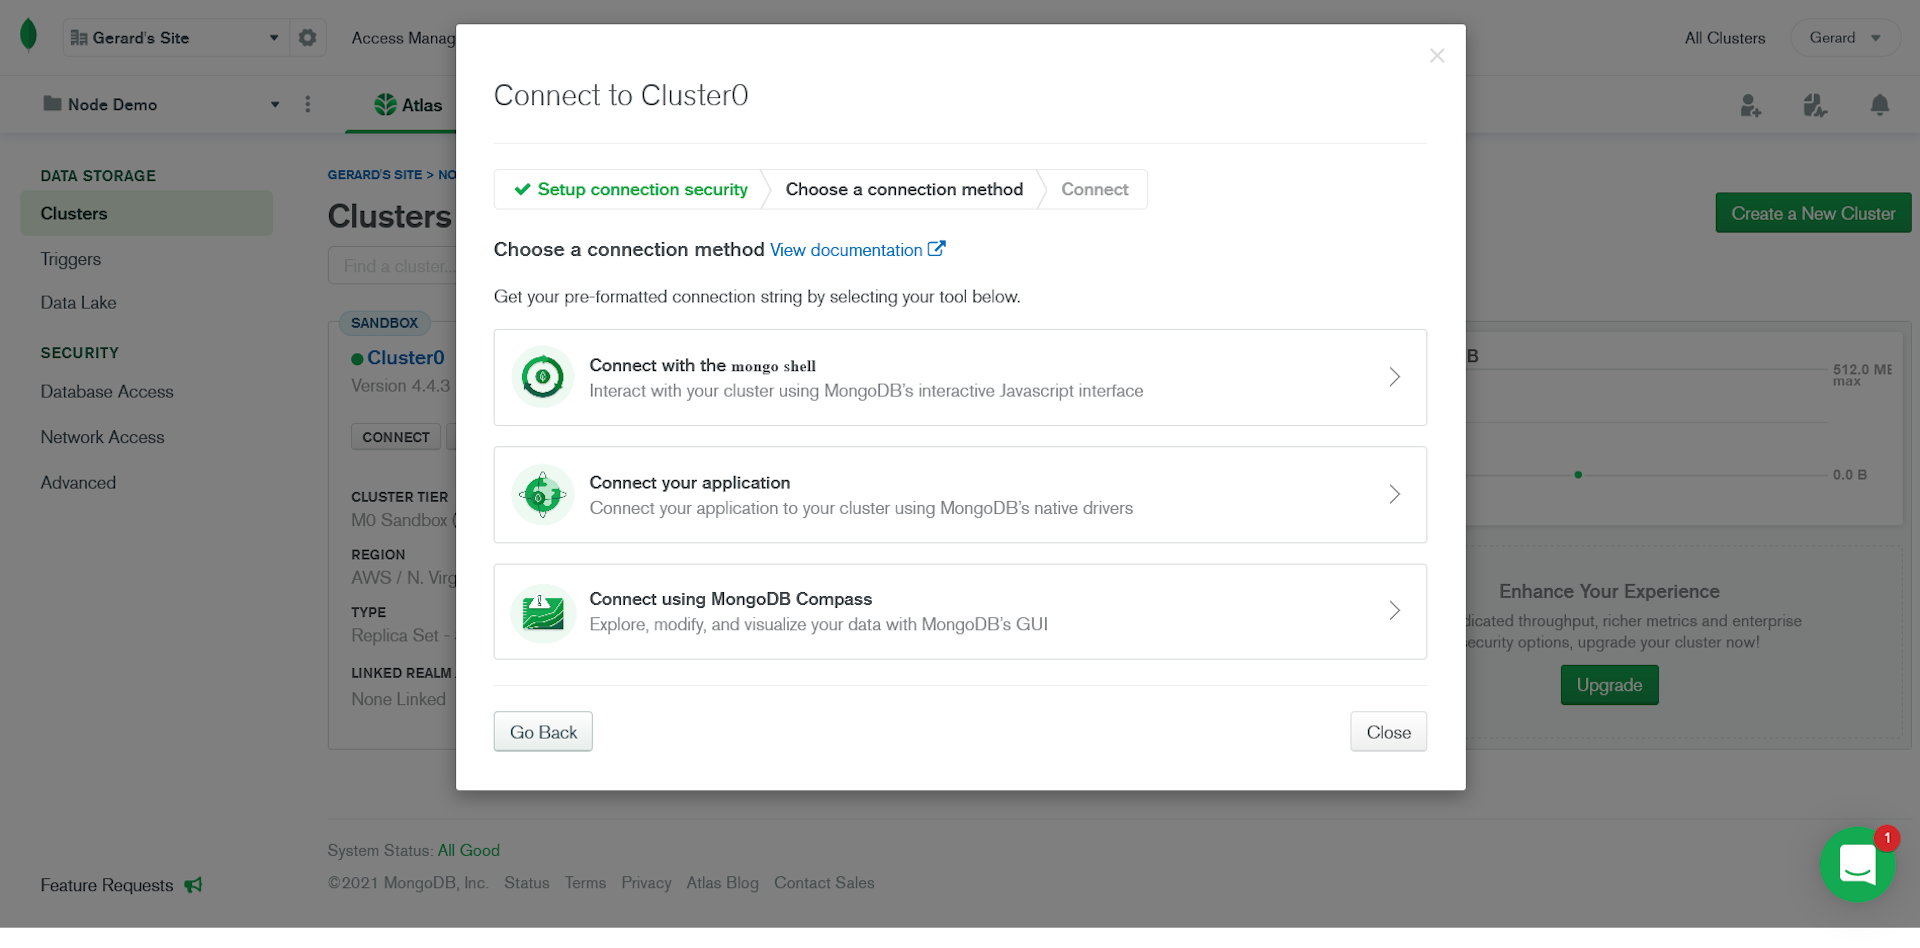
Now click on Choose a connection method.
Select Connect your application
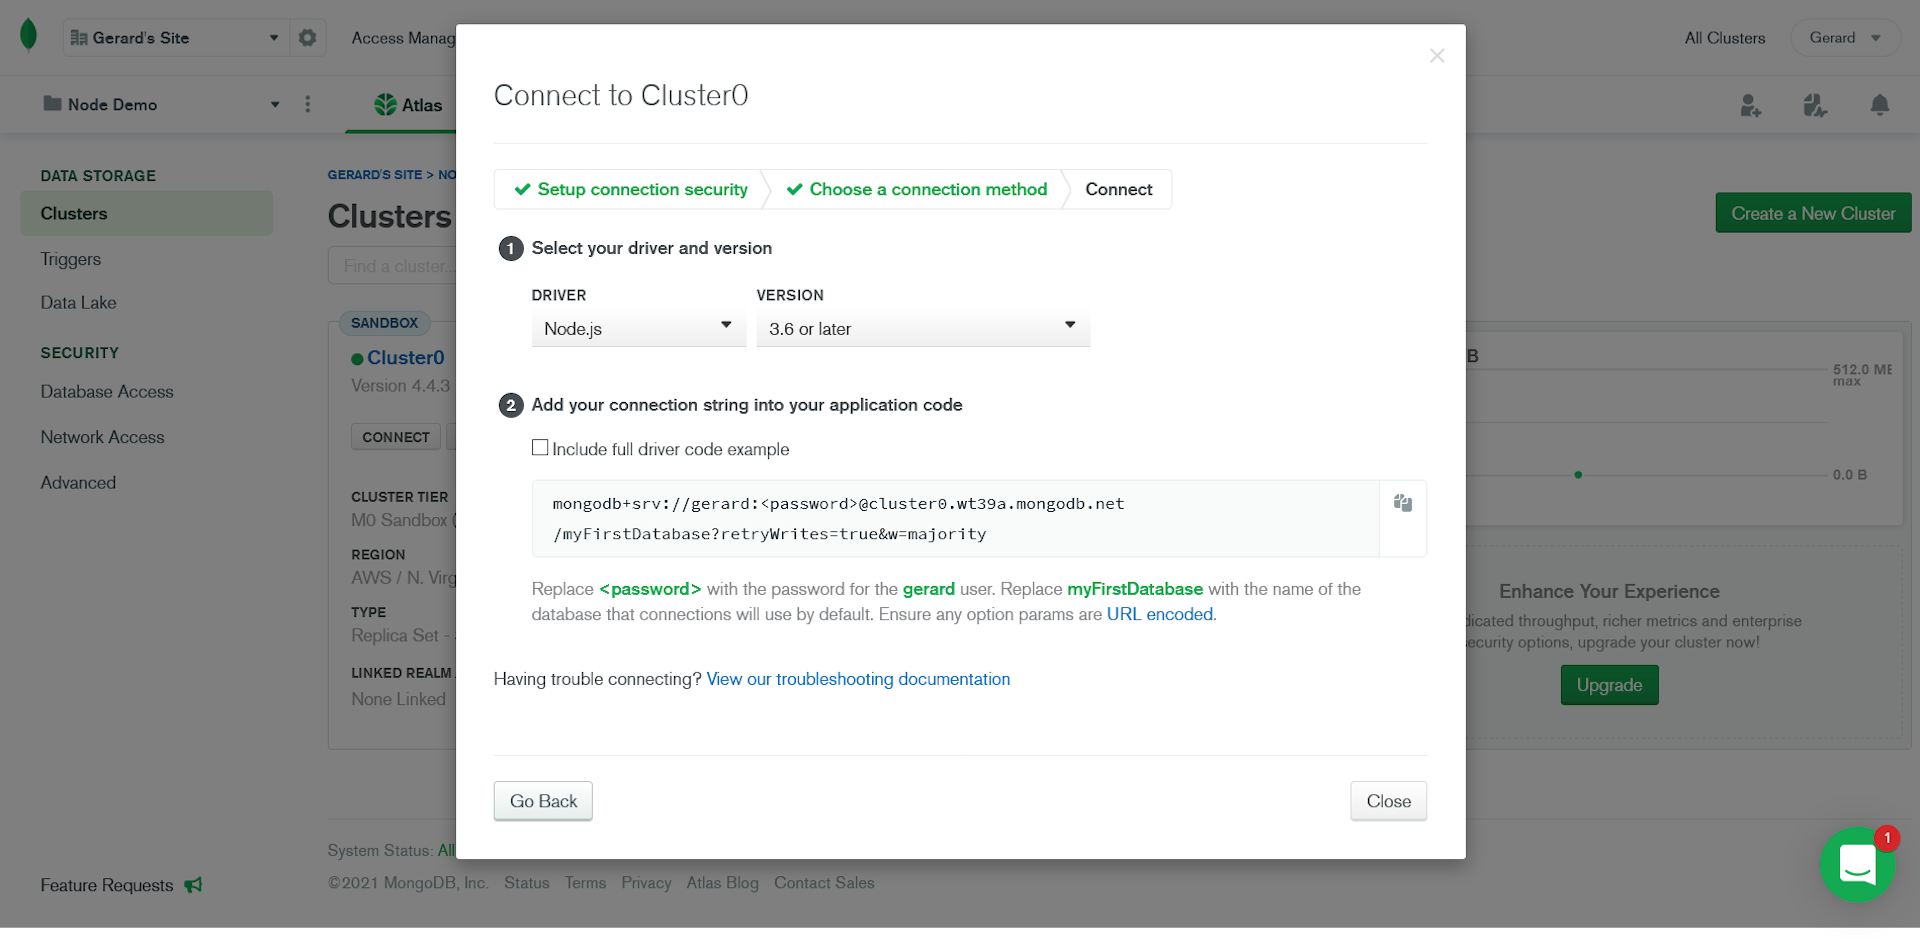
Under Add your connection string into your application code you'll see a URI with the format mongodb+srv://<username>:<password>@<cluster-name>.mongodb.net/<db-name>?retryWrites=true&w=majority. The username, cluster-name and db-name fields will be automatically filled out.
Copy this URI to your clipboard. You'll need it in a minute.
Step 2 - Make a Node App if you don't already have one
If you don't have a Node app to hand, you can download the starter code for a very basic Express app from this repo.
Run npm install to install Express, the only dependency.
Your app.js file should look like this.
// app.js
const express = require("express");
const port = 3000;

const app = express();

app.get("/", (req, res) => {
  res.send("Hello World!");
});

app.listen(port, () => {
  console.log(`Your app is listening on port ${port}`);
});
In your command line, run node app.js and you should see the confirmation message that your app is listening on a particular port.
Step 3 - Store Environmental Variables
Remember your MongoDB Atlas URI? You don't want to just paste that into your code where it could get committed to Git and potentially publicly exposed.
Instead, we're going to save it as an environmental variable.
Install the dotenv package with npm install dotenv.
Create a .env file in the root of your project, paste in your URI, and assign it to a DB_URI variable. Make sure your version includes your password as well as your username, cluster name and database name.
// .env
DB_URI=mongodb+srv://<username>:<password>@<cluster-name>.mongodb.net/<db-name>?retryWrites=true&w=majority
Step 4 - Configure your Database Connection
To keep things organized, I keep my database config in its own file.
In the root of your project, create a db.js file. This will contain all the configuration for connecting to your database.
We're going to use Mongoose to handle connecting to our database.
Install Mongoose with npm install mongoose and import it into db.js.
Import your database URI as db from process.env.DB_URI.
Create a connectDB function. Make sure you mark it as an async function as it will take some amount of time to connect to your database.
Inside connectDB, create a try-catch block to handle any errors that occur.
In the try block, await mongoose.connect(). Pass it the db variable and a settings object. In the settings object, set useNewUrlParser and useUnifiedTopology to true. This will prevent Mongoose from giving you warnings. Mongoose explains the warnings in their documentation.
It's also a good habit to console.log a success message to tell you you've connected to your database. I once spent an hour trying to debug a database connection simply because I wasn't telling myself it was connected.
In the catch block, console.error any error you receive and use process.exit(1) to terminate the process if an error occurs.
Finally, export the connectDB function.
Your db.js file should now look like this.
// db.js
const mongoose = require("mongoose");
const db = process.env.DB_URI;

async function connectDB() {
  try {
    await mongoose.connect(db, {
      useNewUrlParser: true,
      useUnifiedTopology: true,
    });
    console.log("MongoDB connected");
  } catch (error) {
    console.error(error.message);
    process.exit(1);
  }
}

module.exports = connectDB;
Step 5 - Time to Connect to Your Database
In your app.js file, require dotenv and call the config method on it.
Import the connectDB function and call it.
// app.js
require("dotenv").config();
const express = require("express");
const connectDB = require("./db");
const port = 3000;

// Connect to database
connectDB();

const app = express();

app.get("/", (req, res) => {
  res.send("Hello World!");
});

app.listen(port, () => {
  console.log(`Your app is listening on port ${port}`);
});
Congratulations, your Node app is now connected to your MongoDB Atlas cluster. If you run node app.js, you'll see two messages printed to your console: that your app is running and that you've connected to your database. From here you can start to write schemas and perform CRUD operations with your data.
If you ran into any issues, the code for this demo app is in this repo.
More Resources
- MongoDB Atlas Documentation
- MongoDB, Getting Your Free MongoDB Atlas Cluster - YouTube
- MongoDB, MongoDB Atlas Tutorial - How to Get Started - freeCodeCamp